

My Garage
My Account
Cart
Genuine 2005 Ford Excursion Fuel Pump
Gas Pump- Select Vehicle by Model
- Select Vehicle by VIN
Select Vehicle by Model
orMake
Model
Year
Select Vehicle by VIN
For the most accurate results, select vehicle by your VIN (Vehicle Identification Number).
5 Fuel Pumps found
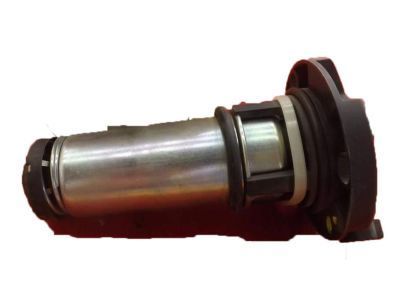
2005 Ford Excursion Fuel Pump Assembly
Part Number: 3C3Z-9C407-AB$172.58 MSRP: $255.00You Save: $82.42 (33%)Product Specifications- Other Name: Pump Assembly - Fuel
- Manufacturer Note: Kit- pump asy.-frame rail mounted. Also serviced in 9G282, Diesel 6.0L
- Replaced by: 6C3Z-9F759-A
- Item Weight: 0.60 Pounds
- Condition: New
- Fitment Type: Direct Replacement
- SKU: 3C3Z-9C407-AB
- Warranty: This genuine part is guaranteed by Ford's factory warranty.


2005 Ford Excursion Fuel Pump Assembly
Part Number: 3C3Z-9275-AA$504.53 MSRP: $830.91You Save: $326.38 (40%)Ships in 1-2 Business DaysProduct Specifications- Other Name: Sender Assembly - Fuel Tank; Fuel Gauge Sending Unit, Fuel Pump Assembly
- Manufacturer Note: Diesel 6.0L
- Base No.: 9275
- Item Weight: 3.00 Pounds
- Item Dimensions: 9.5 x 19.8 x 13.2 inches
- Condition: New
- Fitment Type: Direct Replacement
- SKU: 3C3Z-9275-AA
- Warranty: This genuine part is guaranteed by Ford's factory warranty.
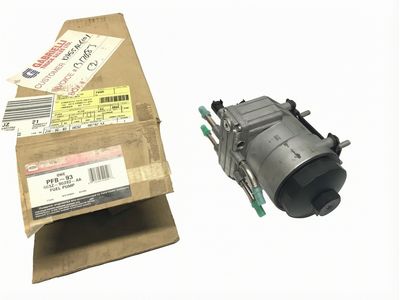

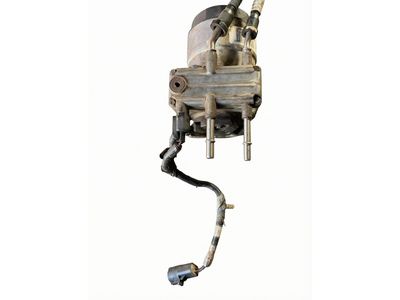

 Product Specifications
- Other Name: Pump Assembly - Fuel
- Manufacturer Note: Frame rail mounted., 6.0L Diesel, FROM 5/16/2005
- Item Weight: 5.30 Pounds
- Item Dimensions: 11.9 x 5.9 x 7.8 inches
- Condition: New
- Fitment Type: Direct Replacement
- SKU: 6C3Z-9G282-AA
- Warranty: This genuine part is guaranteed by Ford's factory warranty.


 Product Specifications
- Other Name: Sender And Pump Assy; Fuel Pump, Fuel Pump Assembly
- Manufacturer Note: 70 micron pump element, With 7 pin connector & 3 pin connector, California, FROM 2/1/2004
- Replaces: 3C7Z-9H307-PA
- Base No.: 9H307
- Item Weight: 3.70 Pounds
- Item Dimensions: 16.5 x 8.2 x 9.0 inches
- Condition: New
- Fitment Type: Direct Replacement
- SKU: 3C7Z-9H307-PB
- Warranty: This genuine part is guaranteed by Ford's factory warranty.

 Product Specifications
- Other Name: Sender And Pump Assy; Fuel Pump, Fuel Pump Assembly
- Manufacturer Note: 70 micron pump element, With single 4 pin electrical connector, gas 49 States, FROM 2/1/2004
- Replaces: 3C7Z-9H307-NA
- Base No.: 9H307
- Item Weight: 3.30 Pounds
- Item Dimensions: 14.4 x 9.5 x 8.1 inches
- Condition: New
- Fitment Type: Direct Replacement
- SKU: 3C7Z-9H307-NB
- Warranty: This genuine part is guaranteed by Ford's factory warranty.
2005 Ford Excursion Fuel Pump
At FordPartsGiant.com, you will find an extensive inventory of genuine 2005 Ford Excursion Fuel Pump offered at competitive prices online. These manufacturer-backed OEM 2005 Ford Excursion Fuel Pump ensure your satisfaction with their quality and come with a hassle-free return policy and expedited delivery service, guaranteeing a delightful shopping experience.
2005 Ford Excursion Fuel Pump Parts Questions & Experts Answers
- Q:How to remove and install a fuel pump on 2005 Ford Excursion?Posted by Cheyenne R.A:Relieve the fuel pressure and disconnect the cable(s) from the negative terminal of the battery. Unless the vehicle has been driven far enough to completely empty the tank, siphoning out the residual fuel before removing the fuel pump is advisable. Raise the vehicle and support it securely on jackstands, then remove the fuel tank. A special fuel line removal tool, available at most auto parts stores, may be required to disconnect the fuel lines from the fuel pump. Use paint or a marking pen to highlight the alignment marks on the fuel pump assembly and the fuel tank. Remove the fuel pump assembly from the fuel tank; for plastic tanks, turn the retaining ring counter-clockwise until loose using a special tool designed for fuel pump removal, or channel locks if the tool is unavailable. For steel tanks, remove the mounting bolts from the fuel pump assembly. Reach into the fuel tank to disconnect the fuel pump latches by squeezing them toward the fuel pump body, push down on the assembly to release it, and carefully lift the fuel pump assembly from the tank, noting the position of the fuel pump and latches. Remove and discard the old seal ring if equipped, then separate the fuel pump from the assembly. Clean the fuel pump mounting flange, the tank mounting surface, and the seal ring groove. Installation is the reverse of removal; apply a thin coat of heavy grease to the new seal ring to hold it in place during assembly, ensuring the fuel pump is aligned properly with the latches on the module inside the fuel tank for a secure snap fit.Answered by Ford Parts Specialist Joseph / Jun 22, 2024
Related 2005 Ford Excursion Parts
 2005 Ford Excursion Fuel Injector O-Ring
 2005 Ford Excursion Throttle Body
 2005 Ford Excursion Throttle Cable
 2005 Ford Excursion Fuel Injector
 2005 Ford Excursion Fuel Level Sensor
 2005 Ford Excursion Fuel Rail
 2005 Ford Excursion Fuel Tank
 2005 Ford Excursion Vacuum Pump