

My Garage
My Account
Cart
Genuine 1994 Ford Ranger Shock Absorber
Suspension Shock Absorber- Select Vehicle by Model
- Select Vehicle by VIN
Select Vehicle by Model
orMake
Model
Year
Select Vehicle by VIN
For the most accurate results, select vehicle by your VIN (Vehicle Identification Number).
3 Shock Absorbers found


1994 Ford Ranger Shock Absorber Kit
Part Number: 5U2Z-18V125-ANA$59.94 MSRP: $101.09You Save: $41.15 (41%)Product Specifications- Other Name: Kit - Shock Absorber
- Replaced by: 5U2Z-18V125-BT
- Item Weight: 6.10 Pounds
- Item Dimensions: 4.0 x 3.3 x 20.0 inches
- Condition: New
- Fitment Type: Direct Replacement
- Require Quantity: 2
- SKU: 5U2Z-18V125-ANA
- Warranty: This genuine part is guaranteed by Ford's factory warranty.


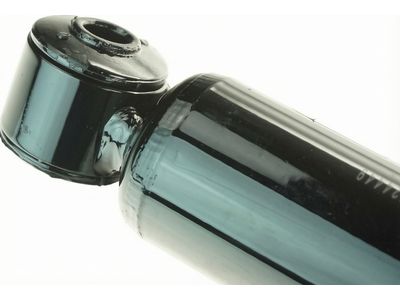
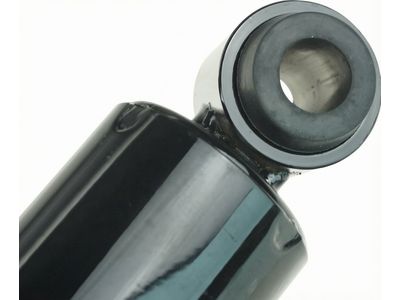
 Product Specifications
- Other Name: Kit - Shock Absorber; Shock, Shock Absorber
- Replaced by: 5U2Z-18V124-ACB
- Item Weight: 3.10 Pounds
- Item Dimensions: 4.6 x 3.5 x 27.6 inches
- Condition: New
- Fitment Type: Direct Replacement
- Require Quantity: 2
- SKU: 5U2Z-18V124-ACA
- Warranty: This genuine part is guaranteed by Ford's factory warranty.
 Product Specifications
- Other Name: Kit - Shock Absorber
- Manufacturer Note: 4X4, BEFORE 12/02/02
- Replaced by: 5U2Z-18V125-BU
- Item Weight: 5.40 Pounds
- Item Dimensions: 20.4 x 3.3 x 4.1 inches
- Condition: New
- Fitment Type: Direct Replacement
- Require Quantity: 2
- SKU: F7AZ-18125-AD
- Warranty: This genuine part is guaranteed by Ford's factory warranty.
1994 Ford Ranger Shock Absorber
At FordPartsGiant.com, you will find an extensive inventory of genuine 1994 Ford Ranger Shock Absorber offered at competitive prices online. These manufacturer-backed OEM 1994 Ford Ranger Shock Absorber ensure your satisfaction with their quality and come with a hassle-free return policy and expedited delivery service, guaranteeing a delightful shopping experience.
1994 Ford Ranger Shock Absorber Parts Questions & Experts Answers
- Q:How to inspect and replace shock absorbers on 1994 Ford Ranger?Posted by Henryk O.A:The common test for shock damping involves bouncing the corners of the vehicle multiple times to observe if it stops bouncing after release; a slight rebound and settling indicate good damping, while continued bouncing suggests the need for shock absorber replacement. If the shock absorbers pass this test, a visual inspection of the shock body for fluid leakage, punctures, or deep dents is necessary, and any leaking or damaged shock absorber should be replaced regardless of the bounce test outcome. After removing the shock absorber, the piston rod should be pulled out and pushed back in several times to check for smooth operation; any hard or soft spots in the piston rod travel warrant replacement. Before installing new shock absorbers, the piston rod should be pumped fully in and out several times to lubricate the seals and fill the hydraulic sections. Caution is advised as low pressure gas shock absorbers are pressurized to 135 PSI with nitrogen gas, and should not be opened, punctured, or heated. The process begins by loosening the front wheel lug nuts on the side to be dismantled, raising the front of the vehicle, securely supporting it on jackstands, blocking the rear wheels, and setting the parking brake before removing the front wheel. The top nut is removed with a deep socket while holding the shaft with an open end wrench, followed by the removal of the bolt and nut securing the shock absorber to the radius arm. To detach the shock absorber, it should be slightly compressed and removed from its brackets. Installation follows the reverse order of removal, ensuring that new nuts and bolts are tightened to the specified torque, followed by the installation of the wheel and lug nuts, lowering the vehicle, and tightening the lug nuts to the appropriate torque.Answered by Ford Parts Specialist Don / Jul 24, 2025
Related 1994 Ford Ranger Parts
 1994 Ford Ranger Tie Rod End
 1994 Ford Ranger Fender
 1994 Ford Ranger Ball Joint
 1994 Ford Ranger Wheelhouse
 1994 Ford Ranger Coil Spring Insulator