
Your vehicle deserves only genuine OEM Ford parts and accessories. To ensure reliability, purchase Ford part # 5L8Z-3A427-DA Front Axle Shaft. It is sometimes referred to as Mercury Axle Shaft. Our Ford parts and accessories are expedited directly from authorized Ford dealers strategically located all across the U.S. and are backed by the manufacturer's 12 month, 12,000 mile warranty. OEM Ford parts are the best for restoring your vehicle to factory condition performance. This part fits specific Mercury Mariner models.
Affordable, reliable and built to last, Ford part # 5L8Z3A427DA Front Axle Shaft stands out as the smart option. FordPartsGiant.com is your prime online source with the biggest and best selection of genuine Ford parts and accessories at giant discounted prices. We have the OEM Ford parts and accessories you need at the wholesale prices. FordPartsGiant.com has you covered no matter what type of Ford vehicle you drive. For detailed Mercury parts information, click here.
Make sure this part fits your vehicle
Mercury 5L8Z-3A427-DA Front Axle Shaft
2005-2008 Mercury Mariner 5L8Z3A427DA
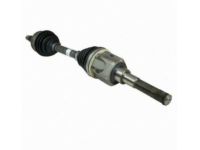


- Part DescriptionShaft - Front Axle
- PositionDriver Side
- Replaced By5L8Z-3A427-C
- ManufacturerFord
$114.40 MSRP: $189.09 1
You Save: $74.69 (40%)
Ships in 1-2 Business Days
Product Specifications
Brand Genuine Mercury Manufacturer Part Number 5L8Z-3A427-DA, 5L8Z3A427DA Part Description Shaft - Front Axle Item Dimensions 33.6 x 4.9 x 4.9 inches Item Weight 14.90 Pounds Position Driver Side Condition New Fitment Type Direct Replacement Manufacturer Ford SKU 5L8Z-3A427-DA Warranty This genuine Ford part is guaranteed by Ford's factory warranty. Shipping & Return Shipping Policy Return Policy Warning: California’s Proposition 65Vehicle Fitment
Year Make Model Engine Important vehicle option details 2005-2008 Mercury Mariner 4 Cyl 2.3L, 4 Cyl 2.3L Hybrid Gas/Electric DOHC, 6 Cyl 3.0L DOHC EFI Modular 4AT CD4E, 5-Speed Manual Transmission, 5-Speed Manual Transmission - AK, Four-Wheel Drive (Full Time) (Left Hand Drive), Four-Wheel Drive (Right Hand Drive), Front-Wheel Drive (Left Hand Drive), Left Hand Drive, Two-Wheel Drive (Left Hand Drive), Two-Wheel Drive (Right Hand Drive)
Customer Questions & Answers
- Q:Will these fit my car and if not which part will? Thank you. Posted by FordPartsGiant Specialist
- A:You can Select Your Vehicle to check if 5L8Z-3A427-DA fits your vehicle.Posted by FordPartsGiant Specialist
- Q:How do I remove the front driveaxle/hub assembly? Posted by Customer
- A:To remove the front, start by loosening the wheel lug nuts, raise the vehicle and support it securely on jackstands, then remove the wheel. Next, remove the axle shaft/hub nut from the axle and discard it, and if equipped with antilock brakes, remove the wheel speed sensor and set it aside. Separate the lower control arm from the steering knuckle. Swing the knuckle/hub assembly out until the end of the axle shaft is free of the hub. If the axle shaft splines stick in the hub, tap on the end of the axle shaft with a plastic hammer. Support the outer end of the axle shaft with a piece of wire to avoid unnecessary strain on the inner CV joint. If removing the right axle shaft, carefully pry the inner CV joint off the intermediate shaft using a large screwdriver or prybar positioned between the CV joint housing and the intermediate shaft bearing support. If removing the left axle shaft, pry the inner CV joint out of the transaxle using a large screwdriver or prybar positioned between the transaxle and the CV joint housing. Be careful not to damage the differential seal. Support the CV joints and carefully remove the axle shaft from the vehicle. To install, pry the old spring clip from the inner end of the axle shaft (left side) or outer end of the intermediate shaft (right side) and install a new one. Lubricate the differential or intermediate shaft seal with multipurpose grease and raise the axle shaft into position while supporting the CV joints. Position the spring clip with the opening facing down. Push the splined end of the inner CV joint into the differential side gear (left side) or onto the intermediate shaft (right side) and make sure the spring clip locks in its groove. Apply a light coat of multi-purpose grease to the outer CV joint splines, pull out on the steering knuckle assembly and install the stub axle into the hub. Insert the ball joint stud into the steering knuckle and tighten the pinch bolt. Install a new axle shaft/hub nut and tighten it before the vehicle is lowered in order to keep the vehicle's weight from damaging the wheel bearing. This can be done by having an assistant use the brake to lock the hub while you tighten the nut, or by bracing a long prybar across two of the wheel studs. Grasp the inner CV joint housing (not the axle shaft) and pull out to make sure the axle shaft has seated securely in the transaxle or on the intermediate shaft. Install the wheel and lug nuts, then lower the vehicle and tighten the lug nuts.For the intermediate shaft removal, remove the right side wheel cover or hub cap and break the hub nut loose with a socket and large breaker bar. Loosen the wheel lug nuts, raise the vehicle and support it securely on jackstands, then remove the wheel. Separate the lower control arm from the steering knuckle. Remove the axle shaft/hub nut from the axle and discard it. Swing the knuckle/hub assembly out until the end of the axle shaft is free of the hub. If the axle shaft splines stick in the hub, tap on the end of the axle shaft with a plastic hammer. Support the outer end of the axle shaft with a piece of wire to avoid unnecessary strain on the inner CV joint. Remove the axle shaft. Remove the bearing support nuts and slide the intermediate shaft out of the transaxle. Be careful not to damage the differential seal when pulling the shaft out. Check the support bearing for smooth operation by turning the shaft while holding the bearing. If you feel any roughness, take the intermediate shaft to an automotive machine shop or other qualified repair facility to have a new bearing installed. For the installation, lubricate the lips of the transaxle seal with multi-purpose grease. Carefully guide the intermediate shaft into the transaxle side gear then install the mounting nuts for the bearing support and tighten them. The remainder of installation is the reverse of removal.For 2004 and earlier models rear removal, block the front wheels to prevent the vehicle from rolling. Loosen the wheel lug nuts, raise the rear of the vehicle and support it securely on jackstands, then remove the wheel. Remove the axle shaft/hub nut and discard it. Remove the coil spring. Remove the nut and detach the trailing arm from the lower suspension arm ball joint. Pry the trailing arm outward and remove the outer end of the axle shaft from the hub. Don't let the axle shaft hang by the inner CV joint. Pry the inner end of the axle shaft out of the differential and remove it from the vehicle. For installation, pry the old spring clip from the inner end of the axle shaft and install a new one. Apply a light film of grease to the area on the inner CV joint stub shaft where the seal rides, then insert the splined end of the inner CV joint into the differential. Make sure the spring clip locks in its groove. Apply a light film of grease to the outer CV joint splines, pry the trailing arm outward and insert the outer end of the axle shaft into the hub. Install the coil spring. Connect the trailing arm to the lower suspension arm and install the nut. Using a floor jack, raise the trailing arm to simulate normal ride height, then tighten the nut. Install a new axle shaft/hub nut and tighten it before the vehicle is lowered in order to keep the vehicle's weight from damaging the wheel bearing. This can be done by having an assistant use the brake to lock the hub while you tighten the nut, or by bracing a long prybar across two of the wheel studs. Install the wheel and lug nuts, then lower the vehicle and tighten the lug nuts. Block the front wheels to keep the vehicle from rolling. Loosen the rear wheel lug nuts, raise the vehicle and support it securely on jackstands, then remove the wheel. Remove the rear wheel axle shaft hub nut and discard it. Remove the coil spring. Remove the wheel speed sensor wiring harness mounting bolt. Remove the four bolts from the stabilizer bar bracket and discard them. Place a floor jack under the knuckle and support it. Remove the bolt from the lower ball joint, then separate the ball joint from the knuckle. Separate the inner and outer ends of the axle shaft from the differential and the hub. Work carefully to avoid damaging the CV joints and boots. Installation is the reverse of removal. Tighten the axle shaft/hub nut before the vehicle is lowered in order to keep the vehicle's weight from damaging the wheel bearing. This can be done by having an assistant use the brake to lock the hub while you tighten the nut, or by bracing a long prybar across two of the wheel studs.Posted by FordPartsGiant Specialist
If you have any questions about this product, please don't hesitate to ask us. We will be happy to help you!
Genuine Ford Part 5L8Z-3A427-DA, the Right Choice
Why choose Ford Parts Giant
- Dedicated Service
Your complete satisfaction is our #1 goal
- Lowest Prices
Best deals on genuine OE parts from dealerships
- Fast Delivery
Orders are processed and delivered promptly