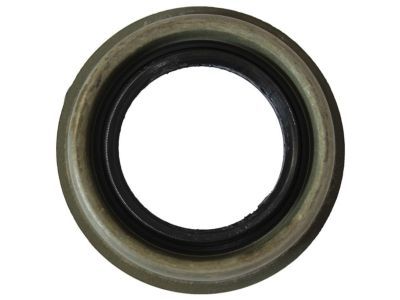
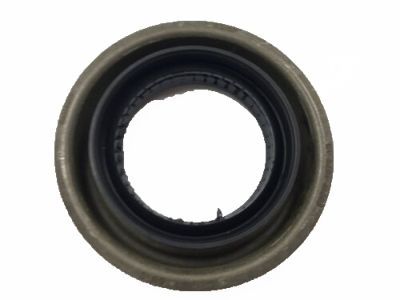
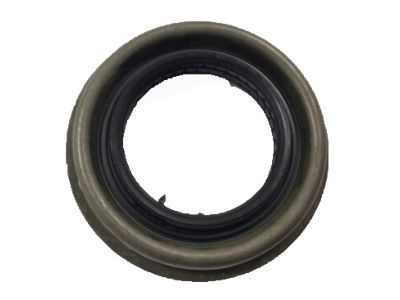
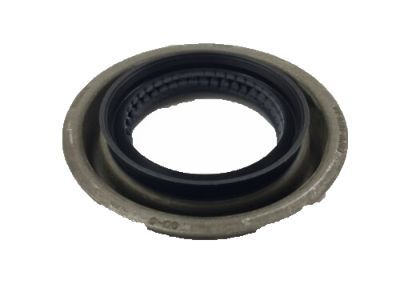
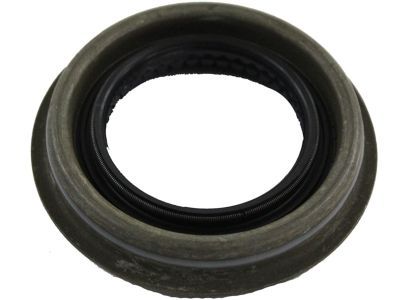
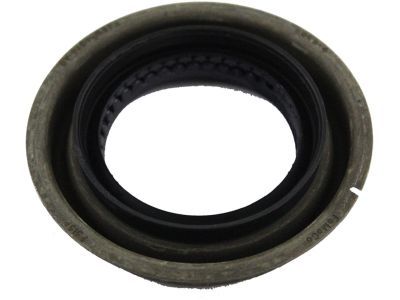
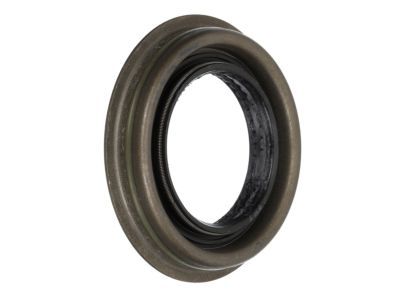
Your vehicle deserves only genuine OEM Ford parts and accessories. To ensure reliability, purchase Ford part # BR3Z-4676-A Seal Assembly - Oil with base parts number 4676. It is sometimes referred to as Ford Differential Seal. Our Ford parts and accessories are expedited directly from authorized Ford dealers strategically located all across the U.S. and are backed by the manufacturer's 12 month, 12,000 mile warranty. OEM Ford parts are the best for restoring your vehicle to factory condition performance. This part fits specific Ford Crown Victoria, F-150, Ranger models. It fits Lincoln Aviator, Mark VI, Mark VIII. It also fits Mercury Capri, Cougar, Mountaineer.
Affordable, reliable and built to last, Ford part # BR3Z4676A Seal Assembly - Oil stands out as the smart option. FordPartsGiant.com is your prime online source with the biggest and best selection of genuine Ford parts and accessories at giant discounted prices. We have the OEM Ford parts and accessories you need at the wholesale prices. FordPartsGiant.com has you covered no matter what type of Ford vehicle you drive. For detailed Ford parts information, click here.
Make sure this part fits your vehicle
Ford BR3Z-4676-A Seal Assembly - Oil
1980-2014 Ford BR3Z4676A
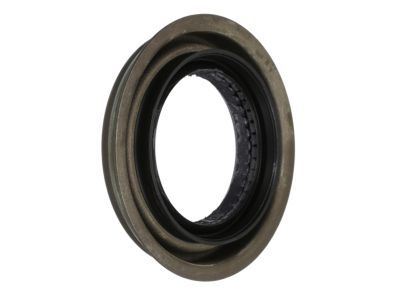
- Part DescriptionSeal Assy - Oil
- Base No.4676
- ReplacesE8TZ-4676-C, F89Z-4676-AA
- ManufacturerFord
$11.70 MSRP: $16.67 1
You Save: $4.97 (30%)
Ships in 1-2 Business Days
Product Specifications
Brand Genuine Ford Base No. 4676 Manufacturer Part Number BR3Z-4676-A, BR3Z4676A Part Description Seal Assy - Oil Other Names Oil Seal, Pinion Gear Seal, Pinion Seal Item Dimensions 9.2 x 7.2 x 1.0 inches Item Weight 0.60 Pounds Condition New Fitment Type Direct Replacement Replaces E8TZ-4676-C, F89Z-4676-AA Manufacturer Ford SKU BR3Z-4676-A Warranty This genuine Ford part is guaranteed by Ford's factory warranty. Shipping & Return Shipping Policy Return Policy Warning: California’s Proposition 65Vehicle Fitment
View MoreYear Make Model Engine Important vehicle option details 1992-2011 Ford Crown Victoria 8 Cyl 4.6L, 8 Cyl 4.6L Romeo SOHC EFI 4-Speed Automatic Transmission 4R75E Livonia, 4AT, 4AT 4R70W, 4AT 4R75W, 4AT AOD, 4AT AOD-E, Left Hand Drive, Rear-Wheel Drive (Left Hand Drive) 2005-2006 Ford E-150 8 Cyl 4.6L Romeo SOHC EFI 4-Speed Automatic Transmission 4R70W (AODE), 4-Speed Automatic Transmission 4R75E Livonia, 4-Speed Automatic Transmission AODEW/4R70E W/TSS, 4-Speed Automatic Transmission AODEW/4R75E W/TSS, 5-Speed Automatic Transmission 5R110W - HI/Torque, 5-Speed Automatic Transmission 5R110W NAAO 2003-2004 Ford Expedition 8 Cyl 4.6L Romeo SOHC EFI, 8 Cyl 5.4L Modular SOHC 4AT 4R75W, 4-Speed Automatic Transmission 4R70W (AODE), 4-Speed Automatic Transmission 4R75E Livonia, 4-Speed Automatic Transmission AODEW/4R75E W/TSS, 6-Speed Automatic Transmission (6R75), 6-Speed Automatic Transmission (6R80), Four-Wheel Drive (Part Time) (Left Hand Drive), Left Hand Drive, Rear-Wheel Drive (Left Hand Drive) 2002-2010 Ford Explorer 6 Cyl 4.0L SOHC EFI, 8 Cyl 4.6L, 8 Cyl 4.6L Romeo SOHC EFI 5-Speed Automatic Transmission 5R55S, 5-Speed Automatic Transmission 5R55W, 5-Speed Manual Transmission (M5R4), 6-Speed Automatic Transmission (6R80), 6-Speed Automatic Transmission 6R60, Four-Wheel Drive (Full Time) (Left Hand Drive), Four-Wheel Drive (Part Time) (Left Hand Drive), Four-Wheel Drive (Part Time) (Right Hand Drive), Left Hand Drive, Rear-Wheel Drive (Left Hand Drive) 2001-2003 Ford Explorer Sport 6 Cyl 4.0L SOHC EFI 5-Speed Automatic Transmission - 5R44E/5R55E, 5-Speed Manual Transmission - R1HD, Four-Wheel Drive (Part Time) (Left Hand Drive), Left Hand Drive, Rear-Wheel Drive (Left Hand Drive) 2007-2010, 2001-2005 Ford Explorer Sport Trac 6 Cyl 4.0L SOHC EFI, 8 Cyl 4.6L 5-Speed Automatic Transmission - 5R44E/5R55E, 5-Speed Automatic Transmission 5R55S, 5-Speed Manual Transmission - R1HD, 6-Speed Automatic Transmission (6R80), 6-Speed Automatic Transmission 6R60, Four-Wheel Drive, Four-Wheel Drive (Full Time) (Left Hand Drive), Four-Wheel Drive (Part Time) (Left Hand Drive), Left Hand Drive, Rear-Wheel Drive (Left Hand Drive), Two-Wheel Drive 2004-2014 Ford F-150 6 Cyl 3.5L DOHC TIVCT, 6 Cyl 3.7L PFI NA, 6 Cyl 4.2L OHV EFI, 8 Cyl 4.6L, 8 Cyl 4.6L Romeo SOHC EFI, 8 Cyl 4.6L Windsor SOHC EFI, 8 Cyl 5.0L MOD DOHC SEFI NA, 8 Cyl 5.4L, 8 Cyl 6.2L OHC NA 4-Speed Automatic Transmission 4R75E Livonia, 4-Speed Automatic Transmission AODEW/4R70E W/TSS, 4-Speed Automatic Transmission AODEW/4R75E W/TSS, 5-Speed Manual Transmission - Mazda M5R2-C, 6-Speed Automatic Transmission (6R80), Four-Wheel Drive (Part Time) (Left Hand Drive), Left Hand Drive, Rear-Wheel Drive (Left Hand Drive) 1980-1983 Ford Fairmont 4 Cyl 2.3L, 6 Cyl 3.3L, 8 Cyl 4.2L, 8 Cyl 5.0L 3AT C3, 3AT C4, 3AT C5, 4MT 1981-1982 Ford Granada 4 Cyl 2.3L, 6 Cyl 3.3L, 6 Cyl 3.8L, 8 Cyl 4.2L 3AT C3, 3AT C4, 3AT C5, 4MT 1980-2014 Ford Mustang 4 Cyl 2.3L, 6 Cyl 3.3L, 6 Cyl 3.7L PFI NA, 6 Cyl 3.8L, 6 Cyl 3.8L OHV EFI, 6 Cyl 3.9L OHV EFI NA, 6 Cyl 4.0L SOHC EFI, 8 Cyl 4.2L, 8 Cyl 4.6L, 8 Cyl 4.6L DOHC EFI, 8 Cyl 4.6L DOHC EFI S/C, 8 Cyl 4.6L SOHC EFI, 8 Cyl 5.0L, 8 Cyl 5.0L DOHC EFI Modular, 8 Cyl 5.0L MOD DOHC SEFI NA, 8 Cyl 5.4L, 8 Cyl 5.4L DOHC EFI S/C ALUM, 8 Cyl 5.8L, 8 Cyl 5.8L DOHC SC 3AT C3, 3AT C4, 3AT C5, 4-Speed Automatic Transmission 4R70W (AODE), 4AT 4R70W, 4AT 4R75W, 4AT A4LD, 4AT AOD, 4AT AOD-E, 4MT, 5-Speed Automatic Transmission 5R55S, 5-Speed Manual Transmission (T450D), 5-Speed Manual Transmission T5OD, 5-Speed Manual Transmission TR3650, 5MT, 6-Speed Automatic Transmission (6R80), 6-Speed Manual Transmission (T56), 6-Speed Manual Transmission Tremec T56, 6-Speed Manual Transmission-MT82, Left Hand Drive, Rear-Wheel Drive (Left Hand Drive)
Customer Questions & Answers
- Q:Can you tell me if this part is correct for my car? Posted by FordPartsGiant Specialist
- A:You can Select Your Vehicle to check if BR3Z-4676-A fits your vehicle.Posted by FordPartsGiant Specialist
- Q:How to remove and replace the rear differential oil seal on Ford Crown Victoria? Posted by Customer
- A:Raise the rear of the vehicle and place it securely on jackstands. Remove the rear wheels and brake drums. Mark the driveshaft and companion flange for ease of realignment during reassembly, then remove the driveshaft. Mark the relationship between the pinion and companion flange. Using an inch-pound torque wrench, measure and record the torque required to turn the pinion nut through several revolutions (pinion bearing preload). Using a suitable tool, hold the companion flange and remove the pinion nut. Using a suitable puller, remove the companion flange. Pry out the old seal with a slide hammer and reversed jaws or other appropriate tool. It may also be removed with a hammer and chisel. Clean the oil seal mounting surface. Tap the new seal into place, taking care to insert it squarely. Inspect the splines on the pinion shaft for burrs and nicks. Remove any rough areas with a crocus cloth. Wipe the splines clean. Install the companion flange, aligning it with the marks made during removal. Gently tap the flange on with a soft-faced hammer until you can start the pinion nut on the pinion shaft. Using a suitable tool, hold the companion flange while tightening the pinion nut to the minimum torque. While tightening, take frequent rotational torque measurements, using the inch-pound torque wrench, until the measurement recorded is reached. Caution: If the measurement recorded was less than the pinion bearing preload torque, continue tightening until the specified torque is reached. If it was more than specified, stop when the specified torque is reached. Under no circumstances should the pinion nut be backed off to reduce pinion bearing preload. Increase the nut torque in small increments and check the preload after each increase. Reinstall the driveshaft, brake drums and wheels. Check the differential oil level and fill as necessary. Lower the vehicle and take a test drive to check for leaks.Posted by FordPartsGiant Specialist
- Q:How to replace a pinion seal on a Ford F-150? Posted by Customer
- A:Loosen the wheel lug nuts. Raise the front or rear of the vehicle and support it securely-on jackstands. Block the opposite set of wheels to keep the vehicle from rolling off the stands. Remove the wheels. Disconnect the driveshaft from the differential pinion flange and support it out of the way with a piece of wire or rope. Rotate the pinion a few times by hand. Use a beam-type or dial type inch-pound torque wrench to check the torque required to rotate the pinion. Record it for use later. Mark the relationship of the pinion flange to the shaft then count and write down the number of exposed threads on the shaft. A special tool or a chain wrench can be used to keep the companion flange from moving while the self-locking pinion nut is loosened. A screwdriver or long punch inserted through one of the holes in the flange can also be used to immobilize the flange. Remove The pinion nut. Withdraw the flange. It may be necessary to use a two-jaw puller engaged behind the flange to draw it off. Do not attempt to pry or hammer behind the flange or hammer on the end of the pinion shaft. Pry out the old seal and discard it. Lubricate the lips of the new seal and fill the space between the seal lips with wheel bearing grease, then tap it evenly into position with a seal installation tool or a large socket. Make sure it enters the housing squarely and is tapped into its full depth. Install the pinion flange, lining up the marks made earlier. If necessary, tighten the pinion nut to draw the flange into place. Do not try to hammer the flange into position. Apply a bead of RTV sealant to the ends of the splines visible in the center of the flange so oil will be sealed in. Install the washer and a new pinion nut. Tighten the nut until the number of threads recorded earlier are exposed. Measure the torque required to rotate the pinion and tighten the nut in small increments until it matches the figure recorded earlier. To compensate for the drag of the new oil seal, the nut should be tightened a little more until the rotational torque of the pinion exceeds the earlier recording by 5 in-lbs. Reinstall all components removed previously by reversing the removal process, tightening all fasteners to their specified torque values.Posted by FordPartsGiant Specialist
- Q:How to remove and replace the rear differential oil seal on Mercury Grand Marquis? Posted by Customer
- A:Raise the rear of the vehicle and place it securely on jackstands. Remove the rear wheels and brake drums. Mark the driveshaft and companion flange for ease of realignment during reassembly, then remove the driveshaft. Mark the relationship between the pinion and companion flange. Using an inch-pound torque wrench, measure and record the torque required to turn the pinion nut through several revolutions (pinion bearing preload). Using a suitable tool, hold the companion flange and remove the pinion nut. Using a suitable puller, remove the companion flange. Pry out the old seal with a slide hammer and reversed jaws or other appropriate tool. It may also be removed with a hammer and chisel. Clean the oil seal mounting surface. Tap the new seal into place, taking care to insert it squarely. Inspect the splines on the pinion shaft for burrs and nicks. Remove any rough areas with a crocus cloth. Wipe the splines clean. Install the companion flange, aligning it with the marks made during removal. Gently tap the flange on with a soft-faced hammer until you can start the pinion nut on the pinion shaft. Using a suitable tool, hold the companion flange while tightening the pinion nut to the minimum torque. While tightening, take frequent rotational torque measurements, using the inch-pound torque wrench, until the measurement recorded is reached. Caution: If the measurement recorded was less than the pinion bearing preload torque, continue tightening until the specified torque is reached. If it was more than specified, stop when the specified torque is reached. Under no circumstances should the pinion nut be backed off to reduce pinion bearing preload. Increase the nut torque in small increments and check the preload after each increase. Reinstall the driveshaft, brake drums and wheels. Check the differential oil level and fill as necessary. Lower the vehicle and take a test drive to check for leaks.Posted by FordPartsGiant Specialist
If you have any questions about this product, please don't hesitate to ask us. We will be happy to help you!
Genuine Ford Part BR3Z-4676-A, the Right Choice
Why choose Ford Parts Giant
- Dedicated Service
Your complete satisfaction is our #1 goal
- Lowest Prices
Best deals on genuine OE parts from dealerships
- Fast Delivery
Orders are processed and delivered promptly


