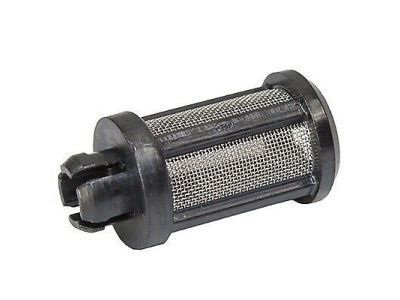
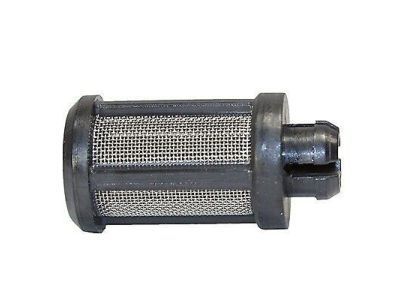
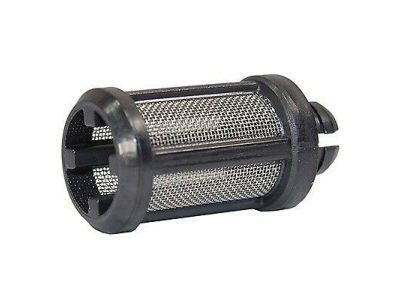
Your vehicle deserves only genuine OEM Ford parts and accessories. To ensure reliability, purchase Ford part # 6M8Z-6731-AA Filter Assembly with base parts number 6C683. It is sometimes referred to as Ford Oil Filter. Our Ford parts and accessories are expedited directly from authorized Ford dealers strategically located all across the U.S. and are backed by the manufacturer's 12 month, 12,000 mile warranty. OEM Ford parts are the best for restoring your vehicle to factory condition performance. This part fits specific Ford Escape, Explorer, Fusion models. It fits Lincoln MKT, MKX, Zephyr. It also fits Mercury Mariner, Milan.
Affordable, reliable and built to last, Ford part # 6M8Z6731AA Filter Assembly stands out as the smart option. FordPartsGiant.com is your prime online source with the biggest and best selection of genuine Ford parts and accessories at giant discounted prices. We have the OEM Ford parts and accessories you need at the wholesale prices. FordPartsGiant.com has you covered no matter what type of Ford vehicle you drive. For detailed Ford parts information, click here.
Make sure this part fits your vehicle
Ford 6M8Z-6731-AA Filter Assembly
2006-2019 Ford 6M8Z6731AA

- Part DescriptionFilter Assy
- Base No.6C683
- ManufacturerFord
$7.37 MSRP: $14.00 1
You Save: $6.63 (48%)
Ships in 1-3 Business Days
Product Specifications
Brand Genuine Ford Base No. 6C683 Manufacturer Part Number 6M8Z-6731-AA, 6M8Z6731AA Part Description Filter Assy Item Dimensions 4.4 x 3.2 x 3.3 inches Item Weight 0.40 Pounds Condition New Fitment Type Direct Replacement Manufacturer Ford SKU 6M8Z-6731-AA Warranty This genuine Ford part is guaranteed by Ford's factory warranty. Shipping & Return Shipping Policy Return Policy Warning: California’s Proposition 65Vehicle Fitment
View MoreYear Make Model Engine Important vehicle option details 2012-2014 Ford Edge 4 Cyl 2.0L EcoBoost (240PS) 6-Speed Automatic Transmission 6F Mid-Range, 6-Speed Automatic Transmission 6F50, Four-Wheel Drive (Full Time) (Left Hand Drive), Four-Wheel Drive (Part Time) (Left Hand Drive), Front-Wheel Drive (Left Hand Drive), Left Hand Drive 2009-2019 Ford Escape 4 Cyl 2.5L Duratec (110kW/150PS), 4 Cyl 2.5L Duratec FFV (125kW/170PS) , 4 Cyl 2.5L PFI Gas/Electric 4AT CD4E, 5-Speed Manual Transmission - AK, 6-Speed Automatic Transmission 6F Mid-Range, CVT Auto Trans Powersplit Elec, Four-Wheel Drive, Four-Wheel Drive (Full Time) (Left Hand Drive), Four-Wheel Drive (Part Time) (Left Hand Drive), Front-Wheel Drive (Left Hand Drive), Front-Wheel Drive (Right Hand Drive), Left Hand Drive, Two-Wheel Drive (Left Hand Drive) 2012-2015 Ford Explorer 4 Cyl 2.0L EcoBoost (240PS) 6-Speed Automatic Transmission 6F Mid-Range, 6-Speed Automatic Transmission 6F50, 6-Speed Automatic Transmission 6F55, Four-Wheel Drive (Full Time) (Left Hand Drive), Front-Wheel Drive (Left Hand Drive), Left Hand Drive 2013-2018 Ford Focus 4 Cyl 2.0L EcoBoost (240PS) 1-Speed Transmission, 5-Speed Manual Transmission - MTX75, 6-Speed Automatic Transmission 6F15, 6-Speed Automatic Transmission DPS6, 6-Speed Manual Transaxle - MMT6, 6-Speed Manual Transmission - B6, Front-Wheel Drive (Left Hand Drive), Left Hand Drive 2006-2019 Ford Fusion 4 Cyl 2.3L, 4 Cyl 2.5L Duratec (110kW/150PS), 4 Cyl 2.5L Duratec FFV (125kW/170PS) , 4 Cyl 2.5L Duratec HE PFI, 4 Cyl 2.5L PFI Gas/Electric 5-Speed Automatic Transmission Mazda FNR5, 5-Speed Manual Transmission (G5M), 6-Speed Automatic Transaxle - AWF21, 6-Speed Automatic Transmission 6F Mid-Range, 6-Speed Automatic Transmission 6F55, 6-Speed Manual Transmission - B6, 6-Speed Manual Transmission Mazda G6M, CVT Auto Trans Powersplit Elec, ECVT Auto Trans Power Split, Four-Wheel Drive (Full Time) (Left Hand Drive), Front-Wheel Drive (Left Hand Drive), Left Hand Drive 2013-2019 Ford Taurus 4 Cyl 2.0L EcoBoost (240PS) 6-Speed Automatic Transmission 6F Mid-Range, 6-Speed Automatic Transmission 6F50, 6-Speed Automatic Transmission 6F55, Four-Wheel Drive (Full Time) (Left Hand Drive), Four-Wheel Drive (Part Time) (Left Hand Drive), Front-Wheel Drive (Left Hand Drive), Left Hand Drive 2013-2016 Lincoln MKT 4 Cyl 2.0L EcoBoost (240PS) 6-Speed Automatic Transmission 6F Mid-Range, 6-Speed Automatic Transmission 6F50, 6-Speed Automatic Transmission 6F55, Four-Wheel Drive (Full Time) (Left Hand Drive), Front-Wheel Drive (Left Hand Drive), Left Hand Drive 2012-2015 Lincoln MKX 4 Cyl 2.0L EcoBoost (240PS) 6-Speed Automatic Transmission 6F Mid-Range, 6-Speed Automatic Transmission 6F50, Four-Wheel Drive (Full Time) (Left Hand Drive), Four-Wheel Drive (Part Time) (Left Hand Drive), Front-Wheel Drive (Left Hand Drive), Left Hand Drive 2007-2012 Lincoln MKZ 4 Cyl 2.3L, 4 Cyl 2.5L Duratec HE PFI, 4 Cyl 2.5L PFI Gas/Electric 5-Speed Automatic Transmission Mazda FNR5, 5-Speed Manual Transmission (G5M), 6-Speed Automatic Transaxle - AWF21, 6-Speed Automatic Transmission 6F Mid-Range, 6-Speed Manual Transmission Mazda G6M, CVT Auto Trans Powersplit Elec, Four-Wheel Drive (Full Time) (Left Hand Drive), Front-Wheel Drive (Left Hand Drive), Left Hand Drive 2006 Lincoln Zephyr 4 Cyl 2.3L 5-Speed Automatic Transmission Mazda FNR5, 5-Speed Manual Transmission (G5M), 6-Speed Automatic Transaxle - AWF21, Four-Wheel Drive (Full Time) (Left Hand Drive), Front-Wheel Drive (Left Hand Drive), Left Hand Drive
Customer Questions & Answers
- Q:Can you tell me if this part is correct for my car? Posted by FordPartsGiant Specialist
- A:You can Select Your Vehicle to check if 6M8Z-6731-AA fits your vehicle.Posted by FordPartsGiant Specialist
- Q:How to change oil filter in a Ford Edge? Posted by Customer
- A:Regular oil changes are a crucial part of preventive maintenance, preventing premature engine wear and detecting potential issues. Some models feature an oil life indicator system that extends the oil change interval beyond the traditional 3,000-mile mark but should not exceed 7,500 miles. Before starting, ensure you have the necessary tools and ample rags or newspapers for cleaning up oil spills. Access to the oil drain plug and filter is improved when the vehicle is lifted on a hoist, driven onto ramps, or supported by jackstands. Start the engine and let it reach normal operating temperature, then park on a level surface and shut it off. Remove the oil filler cap and raise the vehicle, supporting it securely on jackstands. Be cautious of hot exhaust components. Position a drain pan under the oil drain plug and remove the plug with a proper-sized wrench, wearing a rubber glove to avoid burns. Shift the pan as oil flow slows and inspect the old oil for metal particles. After draining, clean the drain plug and surrounding area, reinstall the plug, and move the drain pan under the oil filter. Loosen and remove the oil filter with a wrench or by hand, tilting it upward to prevent oil spillage. Clean the mounting surface and gasket, compare the old filter to the new one, lubricate the gasket with engine oil, and install the new filter by hand (cartridge type filters should be installed with a wrench on the filter cover). Tighten the filter per the manufacturer's instructions, generally 3/4-turn after the gasket contacts the block. Lower the vehicle, check the valve stem core's tightness, and top off the oil as needed. For specific models, including 2.7L V6 versions, follow additional instructions such as removing a canister-type filter housing, replacing O-rings, and tightening to specified torque. After changing the oil, check for leaks, wait for the engine to cool, and dispose of the old oil properly. To reset the oil life monitor on different model years, follow the provided steps, which may involve pressing buttons and monitoring the instrument cluster for reset confirmation.Posted by FordPartsGiant Specialist
- Q:Why are frequent oil changes crucial for preventive maintenance, especially for home mechanics for the 2012 Ford Escape? Posted by Customer
- A:Frequent oil changes are crucial for preventive maintenance because aging engine oil becomes diluted and contaminated over time, leading to premature engine wear. Regular oil changes help maintain engine health and prolong its lifespan.Posted by FordPartsGiant Specialist
- See expert answers on similar Oil Filter
- Q:How can you reset the oil life monitor on the 2016 Lincoln MKX, and what steps are involved in this process? Posted by Customer
- A:To reset the oil life monitor, follow the provided steps, which may involve pressing buttons and monitoring the instrument cluster for reset confirmation. The process may vary depending on the model year and vehicle.Posted by FordPartsGiant Specialist
- See expert answers on similar Oil Filter
- Q:What should you do before changing the oil in the 2012 Ford Fusion? Posted by Customer
- A:Proper preparation is essential, including gathering necessary tools and having rags or newspapers on hand to manage oil spills.Posted by FordPartsGiant Specialist
- See expert answers on similar Oil Filter
- Q:What steps should you follow when changing the oil filter during an oil change for the 2011 Mercury Mariner? Posted by Customer
- A:Position the drain pan under the oil filter and use a filter wrench to loosen it before unscrewing it by hand, tilting the open end upward to prevent oil spillage. Wipe the mounting surface on the engine block and ensure no old gasket remains. Lubricate the new filter's gasket with engine oil and hand-tighten it onto the block.Posted by FordPartsGiant Specialist
- See expert answers on similar Oil Filter
- Q:How to change oil and Filter on Ford Taurus? Posted by Customer
- A:Some models are equipped with an oil life indicator system that illuminates a light or message on the instrument panel when the system deems it necessary to change the oil. A number of factors are taken into consideration to determine when the oil should be considered worn out. Generally, this system will allow the vehicle to accumulate more miles between oil changes than the traditional 3000-mile interval, but frequent oil changes are cheap insurance and will prolong engine life. If you decide not to change your oil every 3000 miles and rely on the oil life indicator instead, make sure you don't exceed 7,500 miles before the oil is changed, regardless of what the oil life indicator shows. Frequent oil changes are the most important preventive maintenance procedures that can be done by the home mechanic. As engine oil ages, it becomes diluted and contaminated, which leads to premature engine wear. Make sure that you have all the necessary tools before you begin this procedure (drain pan, rubber gloves, breaker bar, socket, and filter wrench are required when changing the engine oil and filter). You should also have plenty of rags or newspapers handy for mopping up oil spills. Access to the oil drain plug and filter will be improved if the vehicle can be lifted on a hoist, driven onto ramps, or supported by jack stands. If you haven't changed the oil on this vehicle before, get under it and locate the oil drain plug and the oil filter. The exhaust components will be warm as you work, so note how they are routed to avoid touching them when you are under the vehicle. Start the engine and allow it to reach normal operating temperature-oil and sludge will flow out more easily when warm. If new oil, a filter, or tools are needed, use the vehicle to go get them and warm up the engine/oil simultaneously. Park on a level surface and shut off the engine when it's warmed up. Remove the oil filler cap from the valve cover. Raise the vehicle and support it with jack stands. Make sure it is safely supported! Being careful not to touch the hot exhaust components, position a drain pan under the plug at the bottom of the engine, then remove the plug. Use a proper size box-end wrench or socket to remove the oil drain plug and avoid rounding it off. It's a good idea to wear a rubber glove while unscrewing the plug the final few turns to avoid being scalded by hot oil. It may be necessary to move the drain pan slightly as the oil flow slows to a trickle. Inspect the old oil for the presence of metal particles. After all the oil has drained, wipe off the drain plug with a clean rag. Any small metal particles clinging to the plug would immediately contaminate the new oil. Clean the area around the drain plug opening, reinstall the plug, and tighten it to the torque. Move the drain pan into position under the oil filter. Loosen the oil filter by turning it counterclockwise with a filter wrench. Any standard filter wrench will work. Some engines are equipped with a cartridge-type oil filter. On these types, remove the oil filter cover and element. Once the filter is loose, use your hands to unscrew it from the block. Just as the filter is detached from the block, immediately tilt the open end up to prevent the oil inside the filter from spilling out. Using a clean rag, wipe off the mounting surface on the block. Also, make sure that none of the old gasket remains stuck to the mounting surface. It can be removed with a scraper if necessary. Compare the old filter with the new one to make sure they are the same type. Smear some engine oil on the rubber gasket or O-ring seal of the new filter and screw it into place. Lubricate the oil filter gasket with clean engine oil before installing the filter on the engine. On typical filters, overtightening the filter will damage the gasket, so don't use a filter wrench. Most filter manufacturers recommend tightening the filter by hand only. Normally, they should be tightened 3/4 turn after the gasket contacts the block, but follow the directions on the filter or container. On cartridge-type filters, install the new oil filter element and use the oil filter wrench to tighten the filter cover securely. Do not over-tighten the oil filter cover. Remove all tools and materials from under the vehicle, being careful not to spill the oil in the drain pan, then lower the vehicle. Add new oil to the engine through the oil filler cap. Use a funnel to prevent oil from spilling onto the top of the engine. Pour four quarts of fresh oil into the engine. Wait a few minutes to allow the oil to drain into the pan, then check the level on the dipstick. If the oil level is in the OK range, install the filler cap. Start the engine and run it for about a minute. While the engine is running, look under the vehicle and check for leaks at the oil pan drain plug and around the oil filter. If either one is leaking, stop the engine and tighten the plug or filter slightly. Wait a few minutes, then recheck the level on the dipstick. Add oil as necessary to bring the level into the OK range. During the first few trips after an oil change, make it a point to check frequently for leaks and proper oil level. The old oil drained from the engine cannot be reused in its present state and should be disposed of. Check with your local auto parts store, disposal facility, or environment agency to see if they will accept the oil for recycling. After the oil has cooled, it can be drained into a container for transport to one of these disposal sites. Don't dispose of the oil by pouring it on the ground or down the drain! To reset the oil life monitor, press the SETUP button to display "OIL LIFE XXX% HOLD RESET=NEW." Press and hold the RESET button for two seconds, then release it. The indicator should now read "OIL LIFE SET TO 100%," which is approximately a 7,500-mile interval. This interval can be shortened by pressing and releasing the RESET button; each push of the button reduces the interval by 10 percent.Posted by FordPartsGiant Specialist
If you have any questions about this product, please don't hesitate to ask us. We will be happy to help you!
Genuine Ford Part 6M8Z-6731-AA, the Right Choice
Why choose Ford Parts Giant
- Dedicated Service
Your complete satisfaction is our #1 goal
- Lowest Prices
Best deals on genuine OE parts from dealerships
- Fast Delivery
Orders are processed and delivered promptly


